GitLab CI/CD部署
GitLab CI/CD 是一个内置在GitLab中的工具,用于通过持续方法进行软件开发,本文将介绍GitLab CI/CD部署流程。
- Continuous Integration (CI) 持续集成
- Continuous Delivery (CD) 持续交付
- Continuous Deployment (CD) 持续部署
环境介绍
- gitlab网址:http://www.nico.com
- gitlab项目:nico_test
- 项目部署服务器:ubuntu20.04
实现效果:gitlab代码更新==》触发gitlab CI/CD==》执行服务器上的脚本
服务器部署
1、安装gitlab-runner
# curl -L https://packages.gitlab.com/install/repositories/runner/gitlab-runner/script.deb.sh | sudo bash
# apt install gitlab-runner
2、与gitlab nico_test项目建立连接
# gitlab-runner register
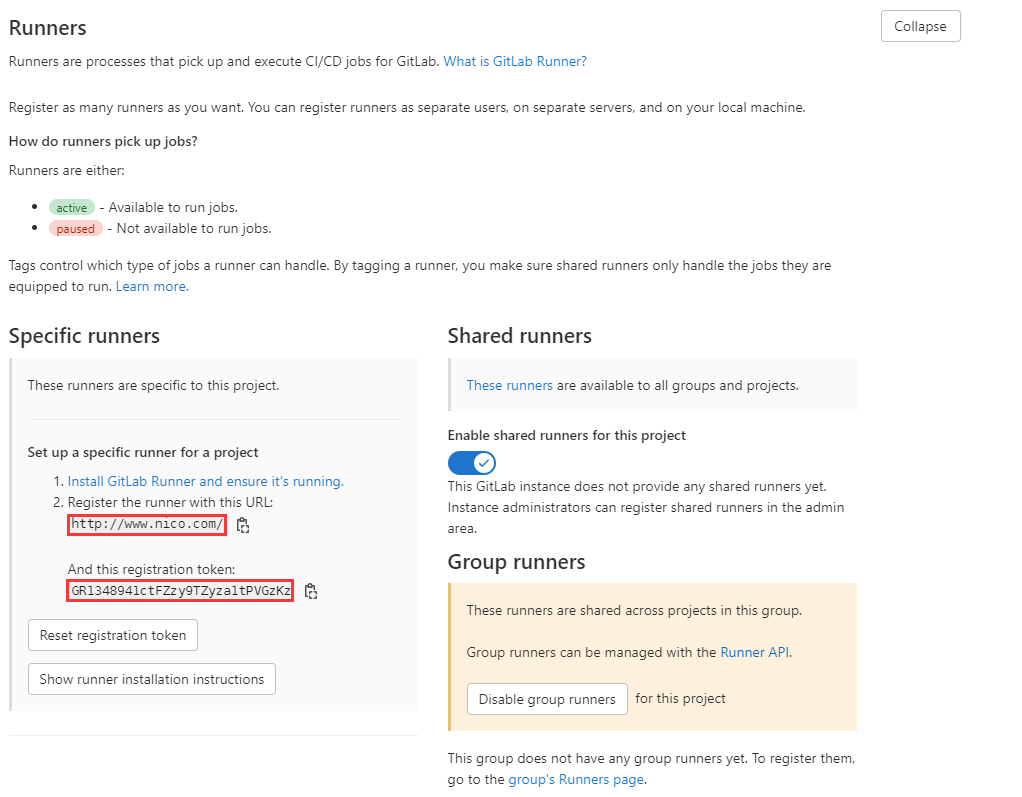
Runtime platform                                    arch=amd64 os=linux pid=63794 revision=0d4137b8 version=15.5.0
Running in system-mode.

Enter the GitLab instance URL (for example, https://gitlab.com/):
http://www.nico.com/                 #从gitlab项目中获取,下面有介绍
Enter the registration token:
GR1348941ctFZzy9TZyza1tPVGzKz        #从gitlab项目中获取,下面有介绍
Enter a description for the runner:
[test]: nico_test_CI/CD              #自定义
Enter tags for the runner (comma-separated):
test                                 #自定义
Enter optional maintenance note for the runner:

Registering runner... succeeded                     runner=GR1348941ctFZzy9T
Enter an executor: docker-ssh, virtualbox, docker+machine, instance, kubernetes, custom, docker, parallels, shell, ssh, docker-ssh+machine:
shell                                #shell代表脚本
Runner registered successfully. Feel free to start it, but if it's running already the config should be automatically reloaded!

Configuration (with the authentication token) was saved in "/etc/gitlab-runner/config.toml"
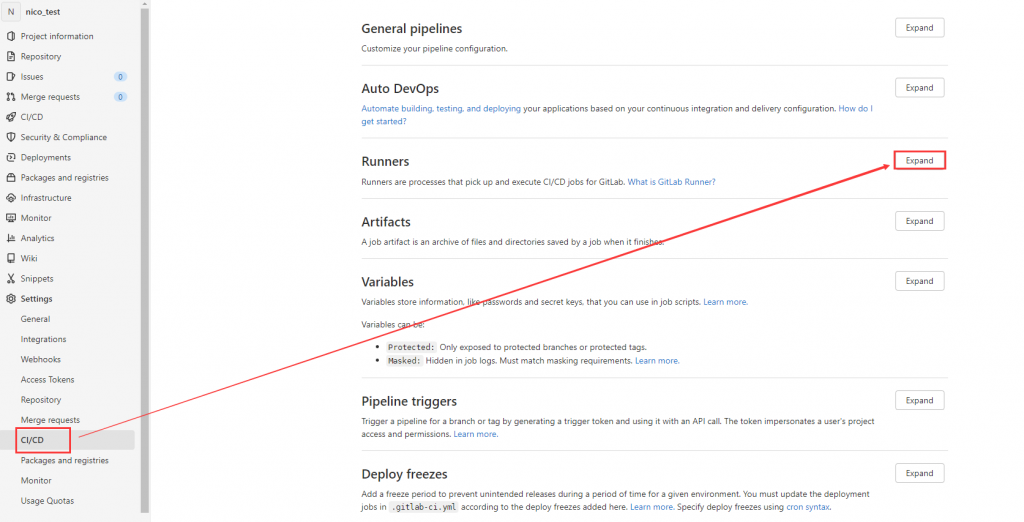
GitLab instance URL 与 the registration token 从下方获取
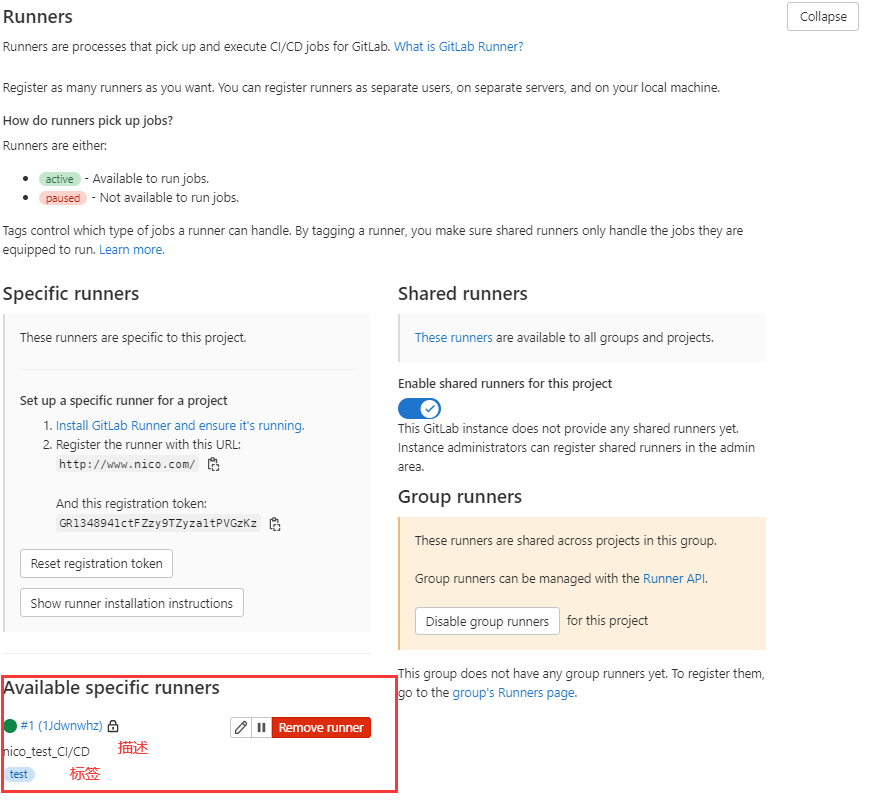
建立成功之后你可以看到活跃的Available specific runners
3、服务器创建gitlab CI/CD触发的脚本
# vim /tmp/test.sh

#!/bin/bash
echo "部署成功啦!!!!!"
赋予脚本执行权限
# chmod +x /tmp/test.sh
赋予gitlab-runner 用户执行脚本的权限
# visudo
gitlab-runner ALL=(root) NOPASSWD:/tmp/test.sh
4、设置gitlab CI/CD触发脚本条件
修改项目中的.gitlab-ci.yml 文件,如果没有这个文件可以手动添加。
stages:
 - job1_test
 - job2_rc
 - job3_prd


job1_test:
     stage: job1_test
     script:
       - sudo /tmp/test.sh     #执行的脚本
     only:
       - test_branch           #test_branch分支发生变化时触发CI/CD执行上面脚本
     tags:
       - test                  #test标签,在上面gitlab-runner register 与服务器建立连接时定义

job2_rc:
     stage: job2_rc
     script:
       - sudo /tmp/test.sh     #执行的脚本
     only:
       - master                #master分支发生变化时触发CI/CD执行上面脚本
     tags:
       - test                  #test标签,在上面gitlab-runner register 与服务器建立连接时定义


job3_prd:
     stage: job3_prd
     script:
       - sudo /tmp/test.sh     #执行的脚本
     only:
       - master                #master分支发生变化时触发CI/CD执行上面脚本
     tags:
       - test                  #test标签,在上面gitlab-runner register 与服务器建立连接时定义
     when: manual              #手从执行CI/CD
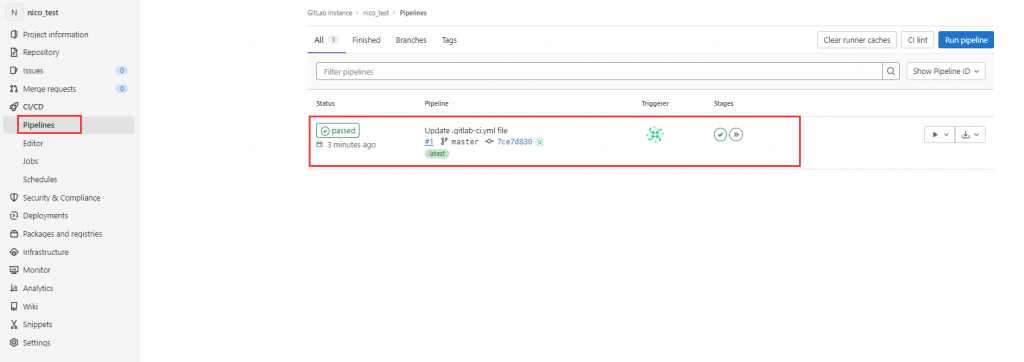
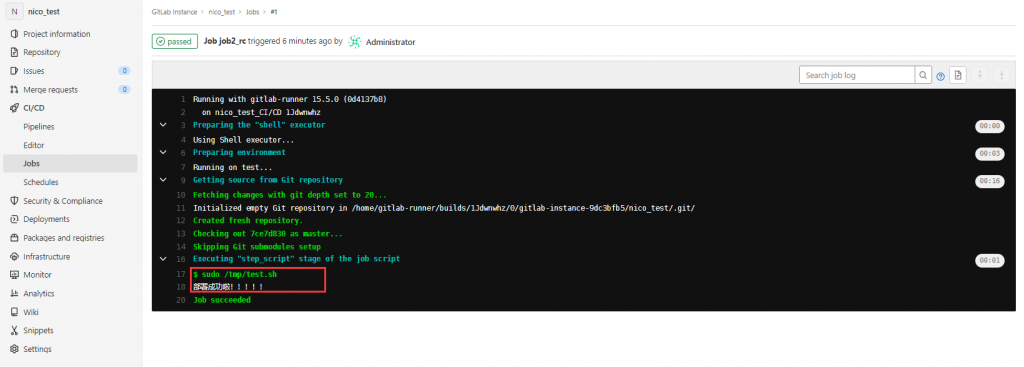
测试
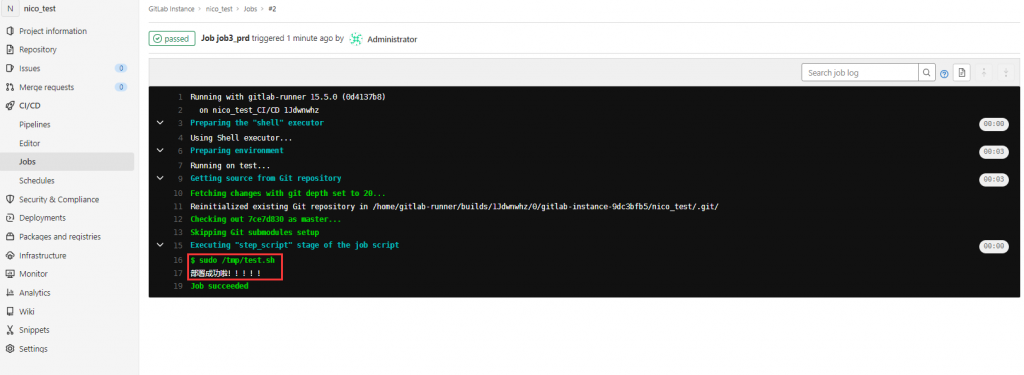
修改master分支的代码,会执行job2_rc 和 job3_prd 的任务,其中job2_rc中定义的脚本自行执行,job3_prd中定义的脚本需手动点击执行


当然修改test_branch 分支的代码,就会执行job1_test中的任务,这里不做演示。